
1,000+ Floors Installed & Restored Across Washington
Tile installation · King & Snohomish County
Looking for a tile installer near you, anywhere from Seattle to Everett? Most tile failures in Puget Sound homes start behind the tile, not on it — porcelain and grout shed water, but only the bonded membrane underneath actually stops it. From Shoreline to Snoqualmie and Mukilteo to Monroe, we build that membrane, leave it flooded for a full day, photograph it, and only then start setting tile.
Puget Sound floors since 2013
Family owned since 2013 · two counties, one standard
Booking takes about 60 seconds
Across King and Snohomish County, most tile projects land between $14 and $26 per square foot installed — that covers the tile, thinset and grout, substrate work and labor, with labor-only pricing starting at $11/sq ft. A tub-and-shower surround typically costs $3,200–$6,800, and a complete bathroom with floor, shower walls and a niche generally runs $6,500–$14,000.
What moves a quote most isn't the price tag on the tile — it's the size and shape of it. Small mosaics and intricate patterns mean hundreds of extra cuts and grout joints, so an inexpensive mosaic can cost more to set than a premium large-format porcelain.
Typical installed ranges across King & Snohomish County homes, September 2026 · tile, materials and labor. Your free on-site estimate gives you the exact written price.
Reading your estimate
A per-square-foot tile price only tells part of the story. Your written estimate separates the tile you choose from the work needed to make the surface sound and, in a shower, waterproof.
| Cost item | What to budget for | What changes it |
|---|---|---|
| Tile material | The material ranges in our tile guide start at $2–$8/sq ft for ceramic, $3–$14 for porcelain, and $8–$30 for natural stone. | Format, finish, pattern, and waste allowance. |
| Installation labor | Labor-only tile installation starts at $11/sq ft on this page. | Small mosaics, oversized pieces, intricate layouts, cuts, and site conditions. |
| Preparation and extras | Tear-out starts at $3.50/sq ft; needed substrate repairs, waterproofing, uncoupling, heat, and trim are scoped at the visit. | What we find under the old finish and whether the project is a floor or a complete wet-area assembly. |
These are planning figures from the price ranges shown on this page, not add-on charges to every job. A standard installed project is generally shown above at $14–$26/sq ft; the itemized quote spells out what is included for your space.
Listed from the framing up. Almost every failed shower we tear out between Seattle and Everett was missing one of these — nearly always the waterproofing, usually skipped to save a few hundred dollars, and it later cost thousands to rip open.
Shower leaks are silent. Water slips past the grout, saturates what's underneath, and only surfaces a year or two later — a spongy hallway floor or a stain on the ceiling downstairs. By then the fix means framing, subfloor, drywall and all-new tile.
Proper waterproofing is roughly a tenth of what a shower costs. Leaving it out is the most expensive shortcut in any bathroom remodel.
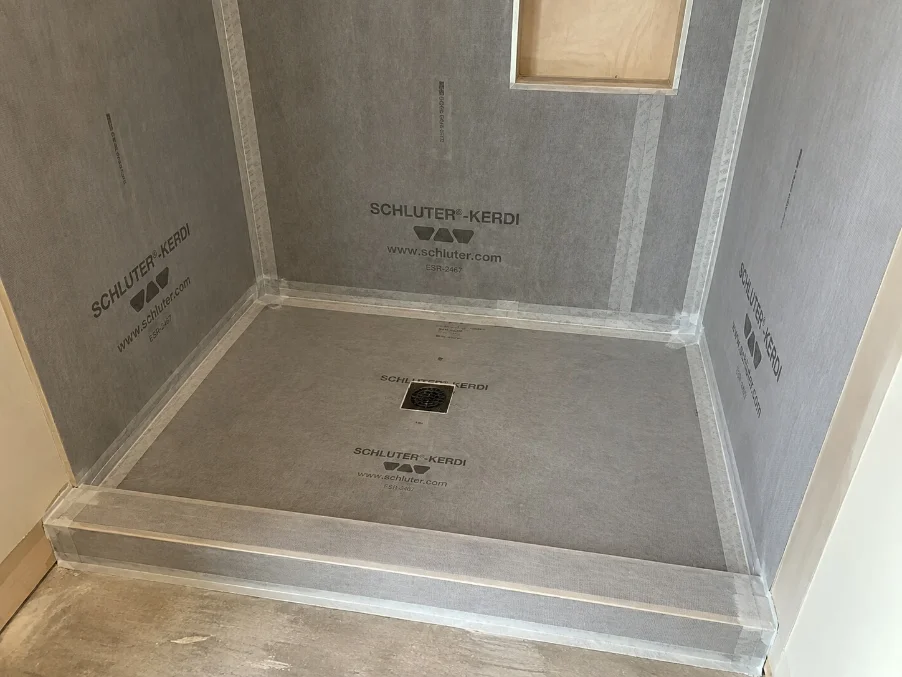
Before the first tile
Tile needs a flat, stable base. A shower also needs a continuous waterproof assembly tied into the drain. We select the layers after checking the existing structure and the requirements for the tile and membrane system.
We check flatness, moisture, and cracks before setting tile. Movement joints must be respected; a suitable crack-isolation or uncoupling layer may be specified where the assembly calls for it.
We check framing stiffness, panel condition and thickness, fasteners, and floor height. The approved underlayment and any additional plywood depend on the joist spacing and tile assembly; backer board alone does not strengthen a weak floor.
Cement board provides a tile-ready surface over suitable framing or subfloor, but is not waterproof on its own. Foam boards can form part of a waterproof system when seams, fasteners, corners, and penetrations are sealed as directed.
Sheet membranes use bonded sheets with sealed overlaps and corners. Liquid-applied membranes are built to the specified thickness and allowed to dry between coats, which can help at niches and irregular shapes. Waterproof foam panels combine a tile substrate and membrane, but every joint and opening still needs the approved seals. The shower base, walls, and drain must work as one system; our 24-hour flood test checks the completed base before tile covers it.
The exact product, substrate requirements, coat thickness, and test timing follow its manufacturer instructions and the project design. Learn how bonded shower waterproofing works.
These are starting points — tile size, the condition of what's underneath and layout detail all shift them. You get the exact number in writing, on site, at no cost.
Complete waterproof build: sloped base, bonded membrane, 24-hour flood test, niches, curbed or curbless entry — then the tile. What matters most is the work hidden behind it.
Kitchens, baths, entryways, laundry rooms and basements. Subfloor leveled first, with an uncoupling membrane wherever movement or floor heat calls for one.
Subway, herringbone, mosaic sheets or slab-look porcelain, with clean cuts around outlets, finished edges, and grout chosen to suit the countertop — not the box.
Electric heating mat over an uncoupling membrane, ohm-tested before and after tile, wired on a dedicated circuit. Best added while the floor is already open.
Cracked tiles, crumbling grout, leaky shower corners. We'll be honest about whether it's a simple fix or the base underneath has already given out.
Existing tile, mortar and backer removed, dust controlled with plastic barriers and air scrubbers, debris hauled away. Your driveway stays clear.
In most Puget Sound homes, tile problems come from putting a good tile in the wrong room. Here's the quick rundown we'd give you on a walk-through.
Prices are for material only, installation not included. We bring samples and show you where each option is worth the money.
Layout details
Long rectangular tile can have a slight bow. A 50% running-bond layout places the high point of one tile beside the low ends of its neighbors and can make uneven edges, called lippage, more noticeable.
For tiles with an edge longer than 18 inches, a one-third (33%) offset is commonly the maximum starting point for a running-bond pattern unless the tile maker and project specification permit another layout. We dry-lay the pattern, verify the tile's actual dimensions and flatness, and choose the grout joint width for that tile rather than promise one width for every product. We flatten the substrate first; leveling clips can help hold neighboring edges aligned as the mortar sets, but they cannot fix a warped or uneven base.
King & Snohomish tile cost calculator
The same math we use in your home — scope, square footage, tile size, prep. It's not a quote, but it's close enough to budget with.
Most bathrooms in King and Snohomish County take four to six working days. The two steps homeowners don't expect are the ones that make the shower last.
After setting
The workdays above are the installation schedule. Safe use also depends on the specific mortar, grout, membrane, and sealant. We tell you the product-specific wait times at the walkthrough, especially during cool or humid Puget Sound weather.
| Stage | Timing to plan for | What controls it |
|---|---|---|
| Working with mortar | The open time is measured in minutes, not the whole working day. | Product data sheet, tile size, heat, humidity, and substrate. |
| Waterproofing test | We hold the shower flood test for 24 hours. | The membrane must first be ready for testing under its instructions. |
| Foot traffic and grouting | Often at least the next day for standard materials; rapid-set products can differ. | Mortar and grout cure instructions and site conditions. |
| Shower use | Wait for the grout and flexible sealant to meet their stated water-exposure times. | The slowest curing product in the shower assembly sets the date. |
There is no safe universal “24-hour cure” for every shower. We confirm the return-to-use time for your actual products. See why mortar open time varies.
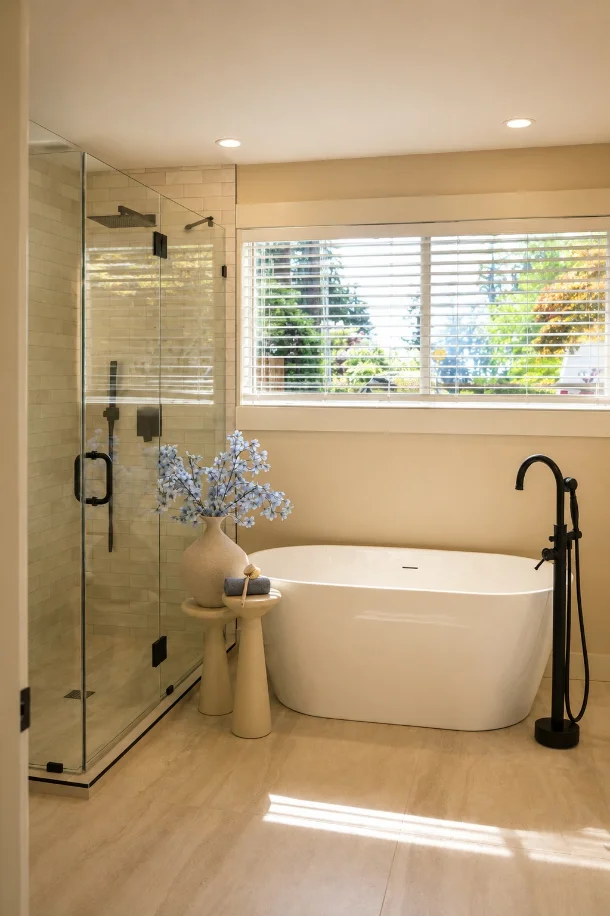
Frameless glass on two sides, cream ceramic stacked vertically to the ceiling, and a large-format stone-look floor carried unbroken under the freestanding tub.
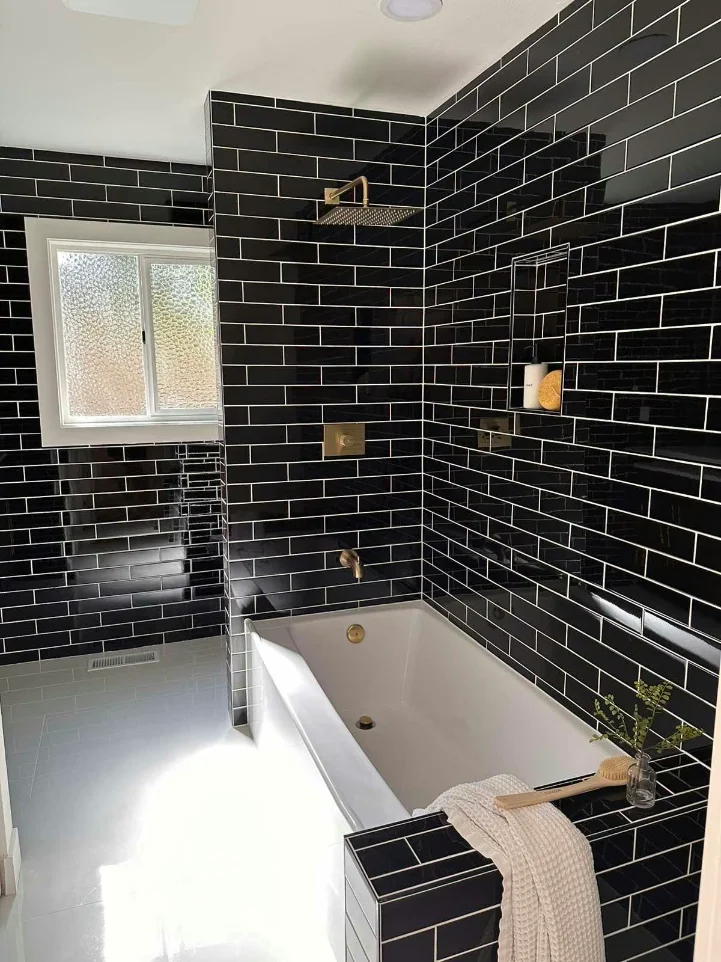
Full-height gloss black ceramic on every wall with a recessed niche, brass rain head and valve, and the original privacy window kept in place.
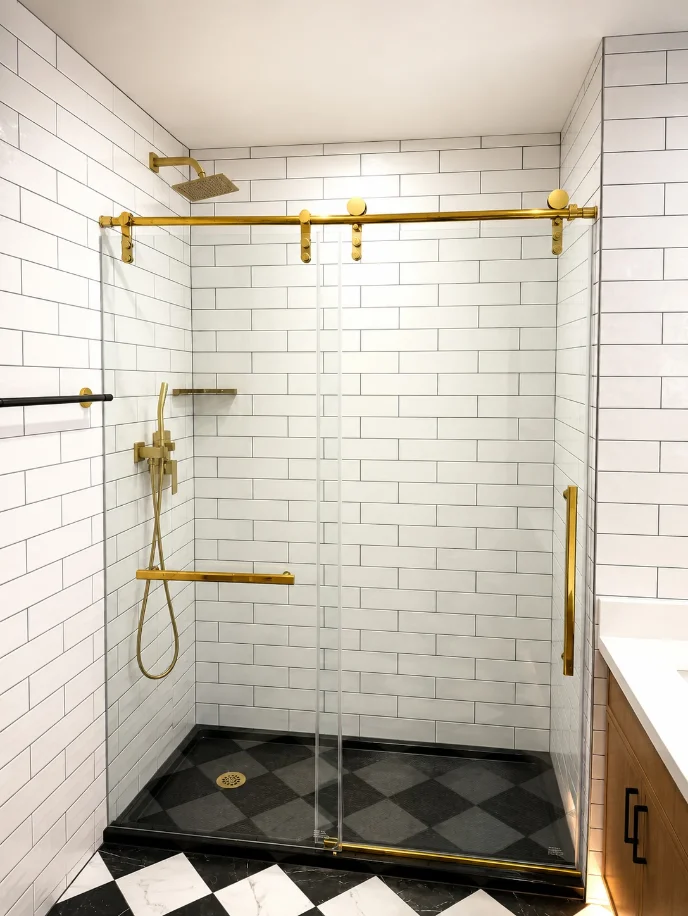
Running-bond white ceramic to the ceiling with dark grout, brass sliding door and shelves, and a black-and-white checkerboard pan echoed in the floor outside.
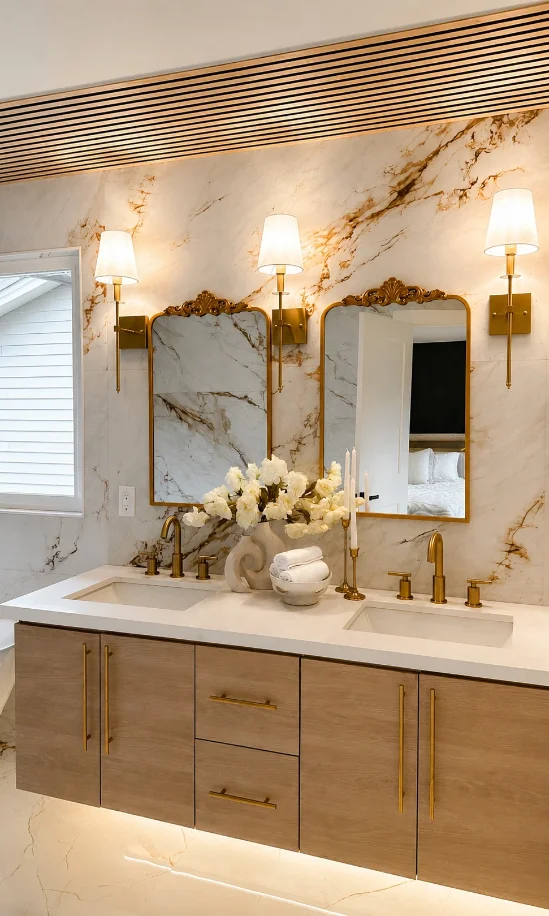
Full-height porcelain slab behind a double vanity, veining run continuously across the wall so no seam interrupts the pattern. Sconces mounted straight through the tile.
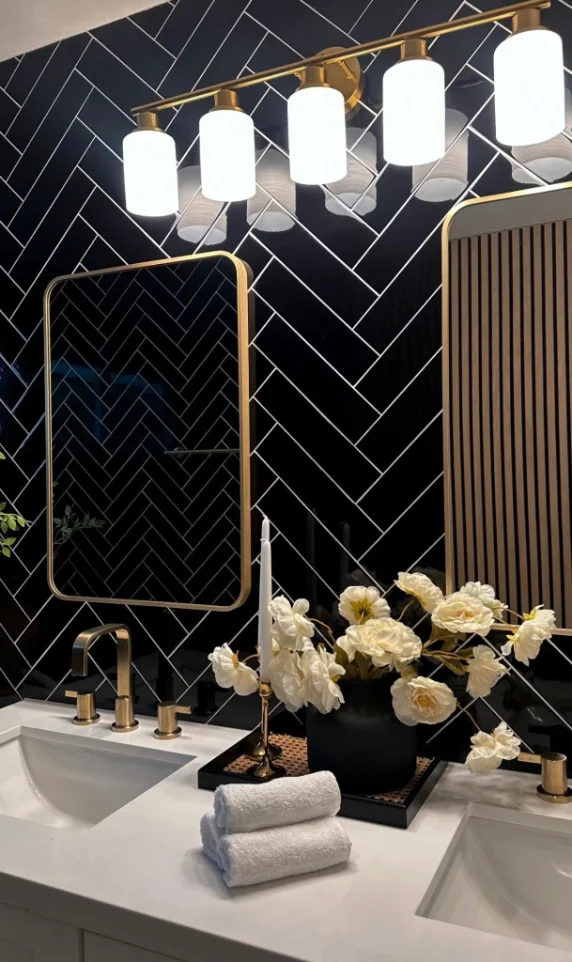
Glossy black ceramic set in a tight herringbone with white grout — the layout that costs the most labor per square foot and shows every millimetre of it.
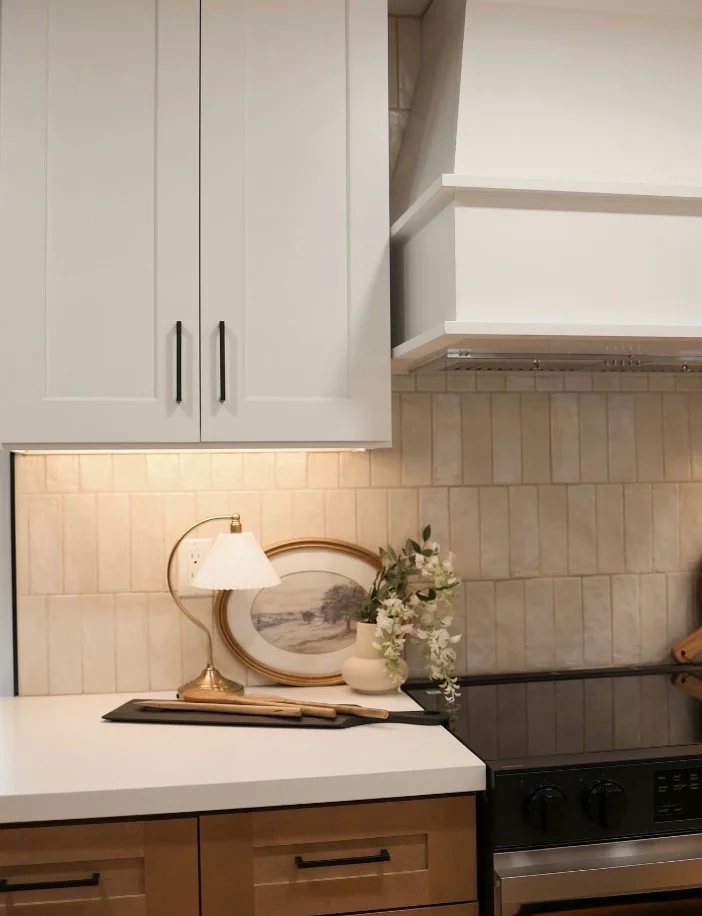
Ivory glazed ceramic stacked vertically from counter to cabinet, joints aligned right through the run, outlets cut in tight beneath the under-cabinet lighting.
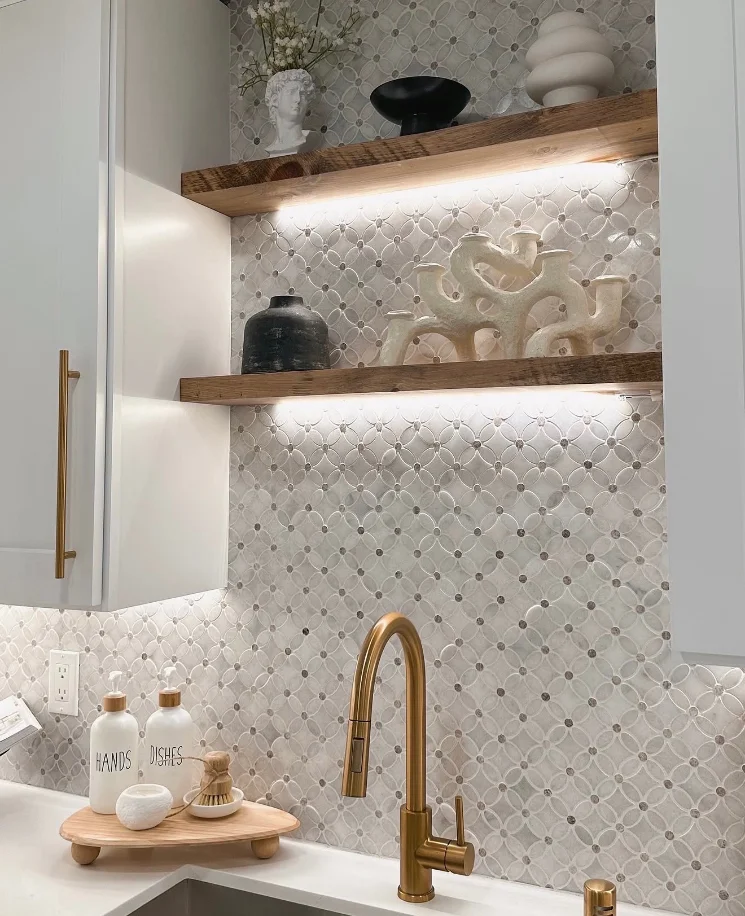
Waterjet marble mosaic run full height behind the sink and up through the shelf reveal, sheets aligned so the pattern never breaks at a seam.
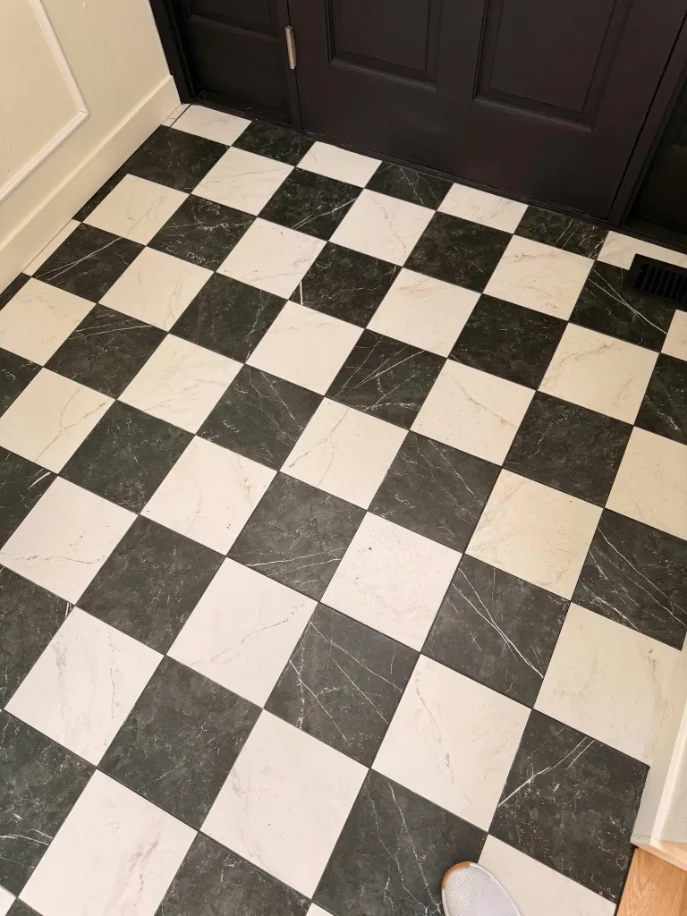
Black and white porcelain set on the diagonal, the layout centred on the door so the pattern lands symmetrically at both walls.
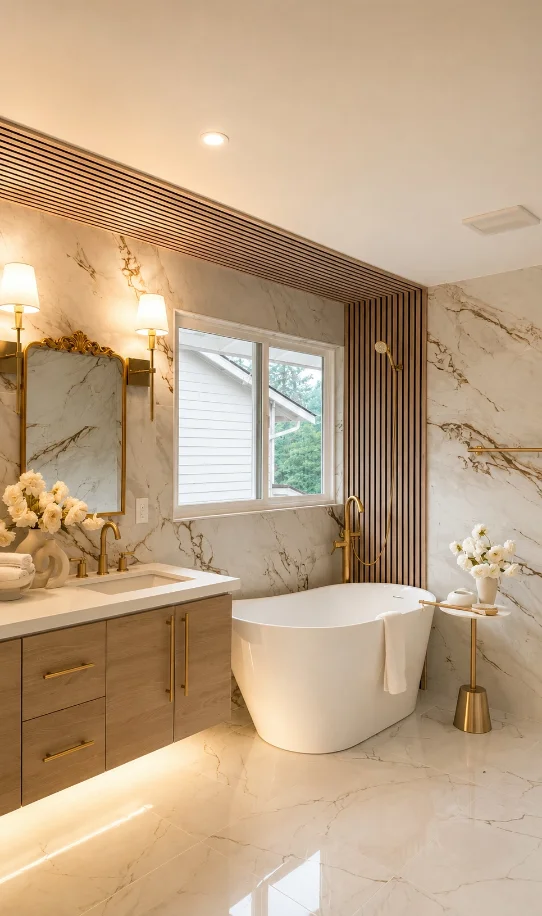
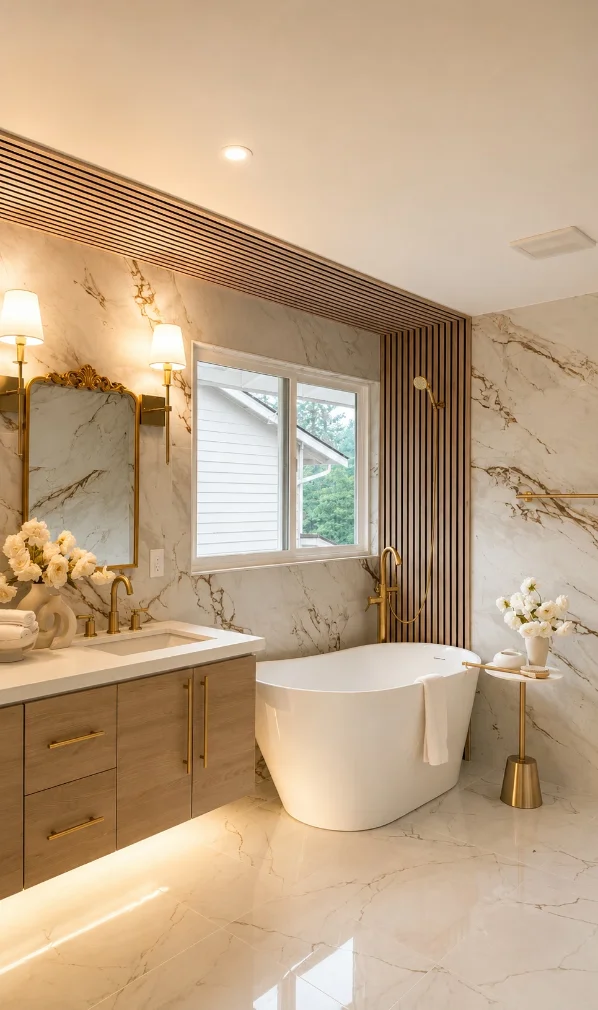
Polished marble-look porcelain on the floor and walls in one run, with an LED reveal under the floating vanity and a wood slat wall behind the tub.
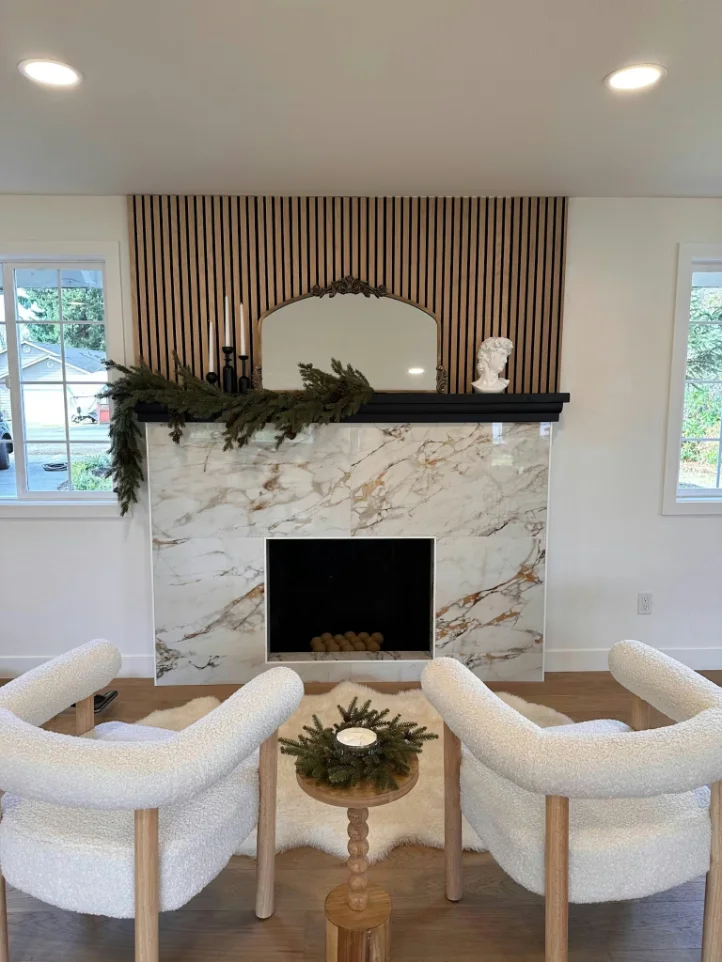
Porcelain slab surround with the veining run through the firebox opening and mitred at the returns, so no cut edge shows from the room.
“They placed plastic sheeting over the cabinets to contain the dust, so we noticed hardly any. The floors look as good or better than new.”
“We chose them because they were professional and top-notch. The work was smooth, fast and cost-effective — such skill and precision!”
“The installers were great! The floor is exactly what we wanted. We worked with OC Flooring previously — highly recommend.”
Question not listed? Call (425) 595-1079 — a real installer picks up, not an answering service.
Most tile projects here are shown at roughly $14–$26 per square foot installed. The written estimate separates your tile selection, setting materials, labor, tear-out or subfloor repair, and any waterproofing, uncoupling, or heat needed for the space. Labor-only installation starts at $11 per square foot, while tile materials vary by type: the guide above shows ceramic at $2–$8, porcelain at $3–$14, and natural stone at $8–$30 per square foot. These are separate planning ranges, not a formula for every job. Tub-and-shower surrounds usually cost $3,200–$6,800, and a full bathroom with floor, shower, and niche typically falls between $6,500 and $14,000. Mosaics, large pieces, and intricate patterns need more labor, so the on-site quote is the reliable price.
A standard alcove shower runs $3,200–$6,800 with us, covering tear-out, a bonded waterproofing system, the sloped base, tile setting, a niche and grout. Curbless designs, built-in benches, floor-to-ceiling stone and steam showers go higher. Waterproofing makes up about 10% of that total — and it is what protects you from a five-figure repair later.
Always. Cement board and thinset alone are not waterproof, so every shower gets a bonded membrane system: a sloped base, sheet or liquid membrane taken up the walls, sealed seams, corners and valve openings, and a 24-hour flood test we photograph before any tile is set. The tile and grout are the finish — the membrane is the part that keeps your framing dry.
Plan on four to six working days for a typical bathroom: tear-out and dust control, substrate and waterproofing, our 24-hour flood test once the membrane is ready, one to two days setting tile, and grout, sealant, and trim. A floor-only job is often one or two working days. The finished floor or shower may need additional time before foot traffic or water exposure; the mortar, grout, and sealant product instructions and the room conditions determine when you can use it. We give you that return-to-use time at the walkthrough.
Choose porcelain anywhere that sees water or foot traffic — floors, shower pans, entries. It is denser than ceramic, absorbs less than 0.5% water and resists chipping. Ceramic works well and saves money on walls and backsplashes. Our default is porcelain for every floor and shower floor, with ceramic or glass reserved for vertical surfaces.
We do. An electric heating mat under tile adds roughly $11–$16 per square foot installed, thermostat included — and in damp Puget Sound winters it is one of the most appreciated upgrades. It is only practical while the floor is open, goes over an uncoupling membrane, is ohm-tested before and after tiling, and runs on a dedicated circuit.
Usually we remove it so we can inspect the structure and set the new floor at a sensible height beside doors and adjoining rooms. Tear-out and disposal starts around $3.50 per square foot on this page. On wood we check for rot, movement, fasteners, and the approved tile underlayment; on concrete we check flatness, moisture, cracks, and movement joints. Backer board does not add structural strength, and an uncoupling or crack-isolation membrane is selected where the assembly calls for one. Tiling over old tile may be possible when it is sound, flat, fully bonded, and compatible with the new system, but it adds height and can conceal damage. If older flooring or adhesive could contain asbestos, have suspect material assessed by a qualified professional before disturbing it.
Most kitchen backsplashes run $1,100–$2,200 for about 30 square feet, installed with outlet cutouts, finished edges and grout matched to your counters. Herringbone, mosaic sheets, a framed feature behind the range or full-height slab-look porcelain land at the higher end because they take more layout and cutting time.
Frequently. Repairs and regrouting start at $8 per square foot and make sense when grout is discolored or crumbling, a few tiles cracked from a dropped object, or shower corners need grout swapped for silicone. Hollow-sounding tiles, tiles loosening in a pattern or a soft wall mean the base has failed and a patch will not last — we tell you which situation you are in before quoting.
Our tile crews work throughout King County — Seattle, Bellevue, Kirkland, Redmond, Sammamish, Issaquah, Renton, Mercer Island, Shoreline, Bothell, Woodinville, Kenmore, Duvall and Snoqualmie — and Snohomish County, including Everett, Lynnwood, Edmonds, Mukilteo, Mill Creek, Marysville, Lake Stevens, Snohomish, Monroe and Arlington, plus Whidbey Island.
Yes — OC Flooring backs tile installation with a 2-year workmanship warranty, because tile issues tend to appear in the second year, not the first week. When we install a manufacturer's complete waterproofing assembly, their system warranty applies too, and the photos of the membrane and flood test give you a record for inspections or a future home sale.